How to use CPLD programmer
|
On this page, I will introduce a procedure which programs the file(JEDEC) which was made with Xilinx Project Navigator to the device using CPLD programmer. The file to use is the 10 input AND circuit which was introduced in "How to use development tools". I will begin the explanation of this page from the condition that the fitting ends normally by the CPLD development tool and that JEDEC file(Extension : JED) is made. First, the personal computer and the CPLD device must be connected. The download cable of the Xilinx Inc., the cable to be selling at the shop or the cable which you made is used for the connection. As for the tools, refer to the page of "CPLD programmer". Connect the parallel port (the printer port) and the device of the personal computer. Then, turn on the power on the side of the device(CPLD programmer). The power display LED (green) of the CPLD programmer will lights up. In some cases, the data display LED (red) lights up too. The data display LED goes out by the procedure after this. 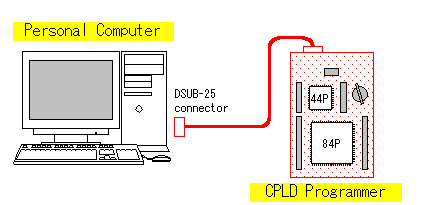 Double-click the menu of JTAG programmer is started up by this operation and the following window is displayed. 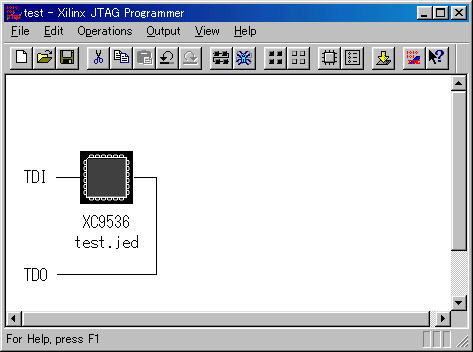 The setup dialog box of the communication cable is displayed when executing Output -> Cable Setup... from the menu. 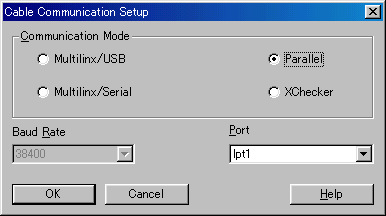 After above setting, click the OK button. The following message will be displayed when normally connected. 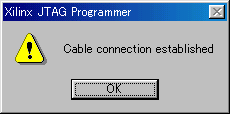 Next, when executing Operations -> Program from the menu, the following dialog box is displayed. 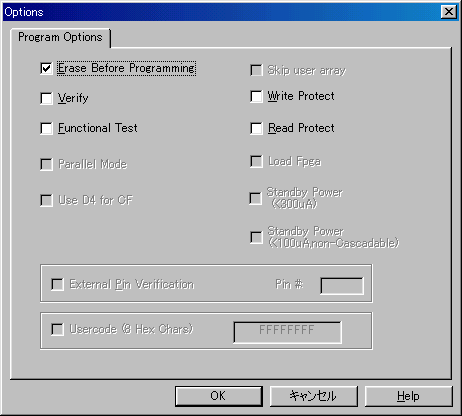 The processing time depends on the amount of data. In the case of me, the processing ended within about 20 seconds. 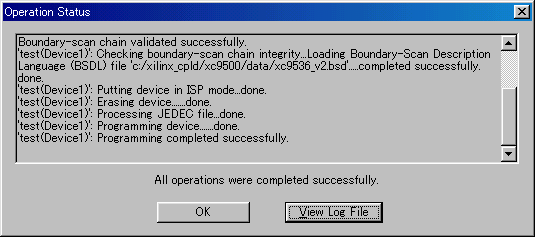 On the screen above, it shows that processing was normally ended. In the window of JTAG Programmer, that a programming was ended is shown(Programmed). 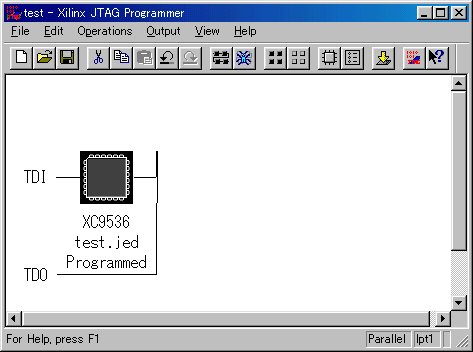 The programming to the CPLD device ended above. Close JTAG Programmer, and remove the cable. The programming work is ending. As for the CPLD programmer which I made, all pins of the CPLD device are connected with the terminal. So, it is possible to do the operation confirmation of the device immediately. I made a simple function tester to confirm CPLD operation. The data which was programed this time is a 10 input AND circuit. The input pins are 9, 11, 36, 35, 37, 34, 13, 38, 8, 12 respectively, and the output pin is 3. Confirm operation using the circuit tester and so on. Confirm that the output pin becomes H level (VCC), only when all input pins are H level (VCC). I confirmed that it worked normally. |