Parts explanation(2)
of the bending apparatus
 It supports the center of the aluminum square lumber. Also, it installs the temperature sensor in this stick. The aluminum square lumber is under pressure little when bending the plastic board. Because the length of the aluminum square lumber this time is 30-cm or less, even if it doesn't support on the way, there is no problem.  This is the sensor to detect the temperature of the exothermic part. The exothermic part (the aluminum stick) becomes more than 160°C. Because the upper limit service temperature of the thermistor is about 120°C, the thermistor is installed separating from the square lumber a little.  This is the sensor of the thermometer. Because the upper limit temperature of the diode is about 150°C, this sensor is installed separating from the square lumber a little same as the thermistor. The display of the thermometer adjusts to show the temperature of the square lumber.  These metal fittings are using to install the thermistor and the diode temperature sensor. Also, it is using to fix the bakelite stick on the chassis, too. 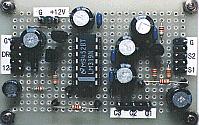 This controller controls the supply of electric power to the nichrome wire by the temperature which was detected with the thermistor temperature sensor and makes the temperature of the exothermic part constant. To make the influence with the alternating voltage little, it is separated from the electric power controller. For the details, refer to "Temperature controller of the bending apparatus". 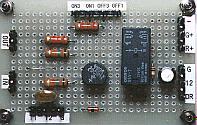 It controls ON/OFF of the supply of electric power to the nichrome wire. The supply of electric power in case of ON and the supply of electric power in case of OFF can be adjusted with the variable resistor. For the details, refer to "Temperature controller of the bending apparatus".  This is the bidirectional triode thyristor(TRIAC) which I am using this time. The details see "Electric power controller". 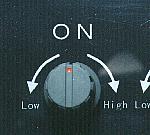 It sets the supply of electric power to the nichrome wire when the temperature of the exothermic part declines with this knob. The rise of the temperature becomes rapid when making the side of High. 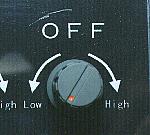 It sets the supply of electric power to the nichrome wire when the temperature of the exothermic part becomes the setting temperature with this knob. I think that it is permitted to be the setting of Low basically. It makes the side of High a little if the temperature seems to fall rapidly. The temperature is falling difficulty as to make the side of High. Don't make the setting above the temperature rise control. The temperature gets not to fall when setting like this.  It sets the temperature of the exothermic part. 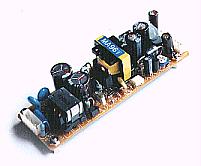 It supplies the power of the temperature controller and the thermometer. The output voltage is using +12 V. This power unit is the switching power supply which outputs DC +5 V and +12 V from AC 100 V. 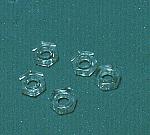 The printed wiring of the LED thermometer is pictured near the screw hole for the fixation. There is possibility to contact electrically when using the nut which is made from the metal. Therefore, I am using the plastic nut. It isn't possible to strangle strongly but it is enough to use this time. It is OK even if it uses the insulation washers such as the one which is made from the bakelite. 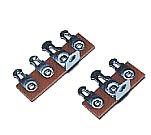 It is using as the relay terminal of the AC cord, or to fix the resistosr for the power supply voltage fall for the thermometer. The terminal to fix the terminal board becomes the grounding. It wires not to be in the mistake. 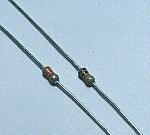 These resistors are the resistor to make the 12-V voltage descend to 9-V. 9 V are used for the power supply of the thermometer. 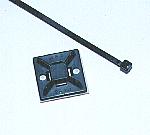 This is the supporter to fix the AC cord on the chassis. The AC cord is soldered to the terminal board. Because the soldered part was easy to break when bending, I fixed the cord on the chassis with the supporter. 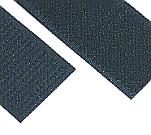 When not using the AC cord, the cord can be fixed with this tape. This tape is the tape to use by the sewing and so on. The loop-shape fibers are put to the tape of the one. And a lot of hooks of the nylon which did the J type are put to the tape of the other. Both can be easily attached or removed.  This is the aluminum square lumber with the 9-mm caliber, the 1-mm thickness. 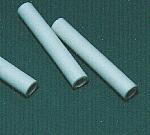 This is the pipe-shape porcelain with 7 mm of the outside diameters, the 5-mm caliber, the 1-mm thickness. The length of the one pipe is 45 mm. This time, I am using these six pipes. I bought this porcelain pipe by "SAKAGUCHI E.H VOC CORP." at Akihabara.  I used the 300-W one that the diameter is 4 mm. I think that the one with the smaller electric power is OK. I bought this nichrome wire by "SAKAGUCHI E.H VOC CORP." at Akihabara.  When putting the porcelain pipe in the aluminum square lumber, the crack occurred. I put the two sticks of the brass with the 2-mm diameter in the tail of the porcelain pipe to make for the heat to be led as much as possible to the aluminum square lumber. With it, the top of the porcelain pipe got to touch the aluminum square lumber. |