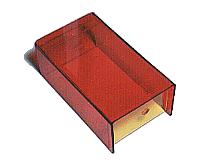
In this page, I explain the way of making the simple case which used the acrylic resin.

 Decision in the form of the case Decision in the form of the case
The case to make this time is the one of the structure which combines the two bent boards.
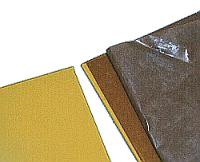
Choice of the acrylic resin
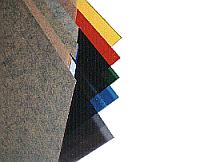
You choose the acrylic resin to use for the case to want to make. You decide the color, the thickness, the size.
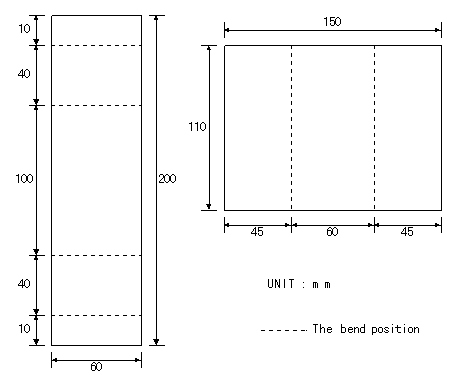
This time, I used the board with the 2-mm thickness. When using the thick board, the change of the length when bending must be considered.
Cut of the acrylic board
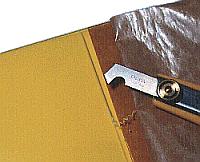
You attache the scale to the cut part and reduce the cutting part with the plastic board cutter. Shave to the about half with the thickness of the board. It is OK if shaving the several times with the cutter and the ditch is built. To shave isn't necessary until the board separates. It is enough as much as the half with the thickness.
The attention point when shaving is to do on the bench with the flaw which may be stuck. Or, it is to let out the part of the acrylic board at the end of the shaving beforehand outside the bench. The blade of the cutter damages the bench when the cutter comes off the acrylic board in the part at the end of the shaving.
Next, you break the shaved part. You hold the side on the bench to the border in the shaved position and push the side which goes out of the bench below and break it. First you fear that the other part breaks. However, you can divide beautifully by the part which shaved the board. To break force well is the know-how. I have never failed. However, when there is little shaving, there is possibility that the other part breaks.
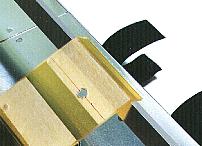
Marking of the bend position
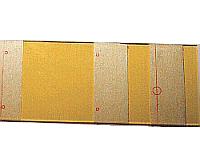
You paste the paper tape to the position to bend. You paste the side of the paper tape according to the bend position. You don't make a mistake in the position when you paint the ink the paper tape end of being one.
The one of the photograph isn't doing like this. The red line is the mark which makes a hole.
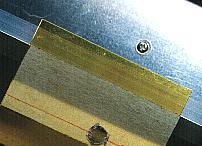
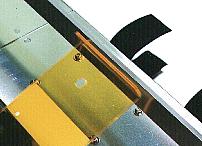
Making holes
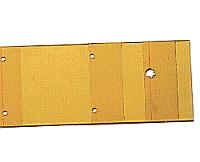
To make holes, the condition of the flat board is easier.
Bending the acrylic board
You hit the part to bend of the acrylic board against the exothermic part of the bending apparatus. You push a little below with the finger and wait for the acrylic fiber board to become soft.
If the board turns to the 20 or 30-degree angle, you separate from the bending apparatus once. You wait for a few coldness of you to be done while you hold with the hand so as not to become turn back.
You peel off the paper tape. Because the position to bend was already decided, the tape is unnecessary. The adhesion part of the paper tape becomes soft when the temperature becomes high. The adhesion part is sometimes left at the acrylic board. You remove it beautifully using the adhesion part of the paper tape.
You hit the pointed side of the acrylic board against the exothermic part again. You confirm the softness while you hold with the hand. If becoming soft, you bend into the necessary angle. The acrylic board doesn't get cold immediately. Because it is, when adjusting to the necessary angle, you don't have the problem even if you separate from the exothermic part. When hitting the acrylic board against the exothermic part long, the other part becomes soft around the part to bend and doesn't become the good result.
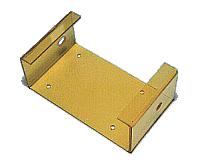
This time, I placed on the flat board, having the sidepiece down while the bend part was soft to make the sidepiece of the case flat. Then, until it got cold, I didn't move the board.
Making of the lid
I bent the part of the lid in the same way too.
First, I bent the one side to the 90 degrees. Next, I put on in the part of the body when bending the side of the remainder and I adjusted the combination.
When there is a warp, you heat the bend part once again and you adjust it.
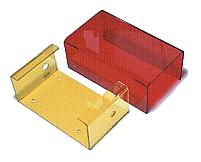
Lid fixation screw

I fixed the lid using the plate screw from the top of the lid.
I made four 3.2-mm holes at the lid of the position of the center of the top curve of the front panel and the back panel. Then, I shaved the hole for the head of the plate screw to be able to be mumbling with the 5-mm drill.
Next, I made four 2.5-mm holes at the top curve of the front panel and the back panel. The position of the hole is the position which is the same as the hole of the lid.
I made the 3-mm screw in the hole using the tap of the 3-mm screw. Because the acrylic resin is soft, it needs to make a hole carefully.
Acrylic case was complete above.
|